To switch HDMI on an MSI monitor, use the input or source button on the monitor’s control panel. Introducing an MSI monitor into your setup can enhance your viewing experience, whether you use it for gaming, work, or entertainment purposes.
However, if you want to switch the HDMI input on your MSI monitor, it’s important to know the correct steps. We will provide you with a concise guide on how to switch HDMI on your MSI monitor easily. By following these instructions, you can quickly toggle between different devices connected to your monitor using HDMI and ensure that you get the most out of your setup.
How To Switch HDMI on MSI Monitor
Are you having trouble switching HDMI on your MSI Monitor? Don’t worry, in this blog post, we will guide you through the step-by-step process of switching HDMI on an MSI Monitor. Whether you want to connect your gaming console, Blu-ray player, or any other HDMI device, we’ve got you covered. So, let’s dive in and learn how to switch HDMI on MSI Monitor!
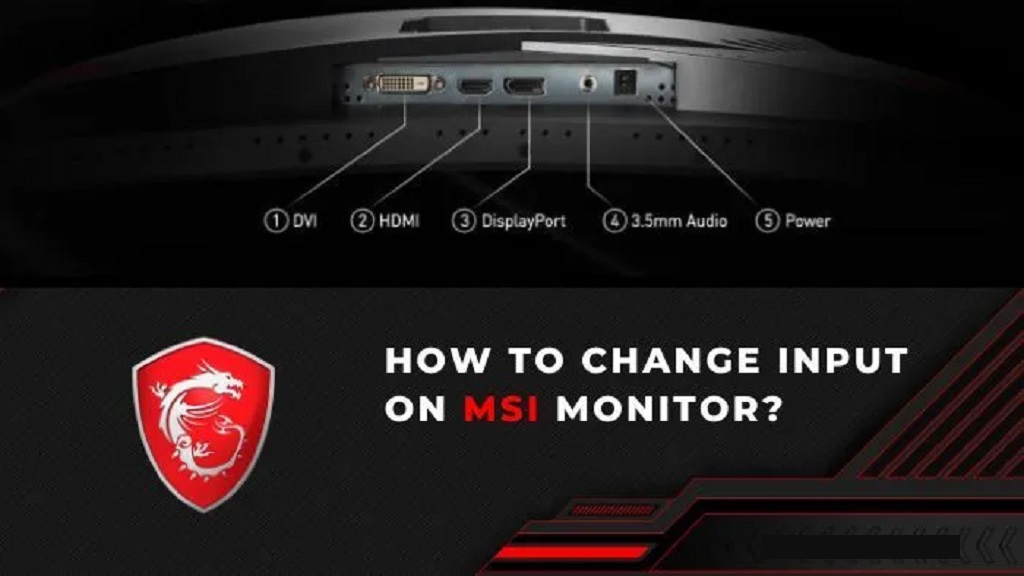
Check HDMI Port Connection
The first step before switching HDMI on your MSI Monitor is to check the HDMI port connection. For guidance on how to proceed with this, you may look up MSI monitor change input for specific steps. Ensure that your HDMI cable is securely plugged into both the HDMI port of your monitor and the HDMI output port of your device. This simple check will ensure a stable connection for a hassle-free switching experience.
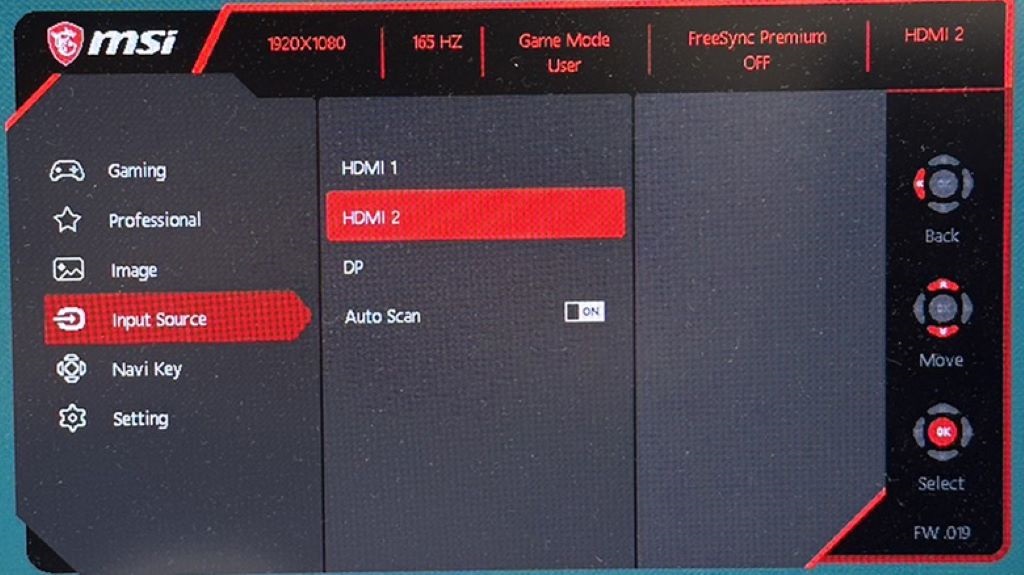
Navigate Monitor Settings Menu
Once you’ve made sure the HDMI cable is properly connected, it’s time to navigate through the monitor settings menu. Locate the settings button on your MSI Monitor, usually placed on the side or bottom of the monitor. Press the settings button to access the menu options.
Select Hdmi Input
Within the monitor settings menu, look for the option to select the input source. Scroll through the menu using the navigation buttons until you find the “Input” or “Source” section. Here, you’ll see a list of available input sources. Select the HDMI input option to enable an HDMI connection for your MSI Monitor.
Confirm And Test Connection
After selecting the HDMI input on your MSI Monitor, it’s important to confirm and test the connection. For helpful tips and tutorials, you might want to check out https://ask4files.com/. The monitor settings menu will usually display the selected input source. Take a moment to verify that HDMI is indeed selected as the input source. Once confirmed, you can test the connection by turning on the device connected via HDMI. If everything is set up correctly, you should see the device’s output on your MSI Monitor.
Additional Tips For Smooth Switching
Here are some additional tips to ensure smooth switching of HDMI on your MSI Monitor:
- Make sure the HDMI cable is high-quality and in good condition.
- Avoid bending the HDMI cable too sharply, as it can damage the cable and affect the signal quality.
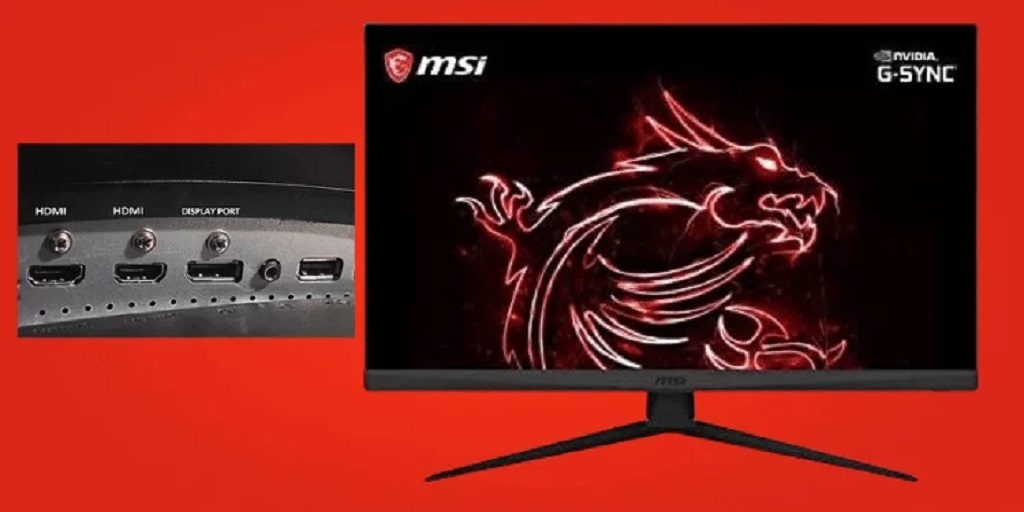
- If you have multiple HDMI ports on your MSI Monitor, remember which port you have connected your device to for future reference.
- If you experience any issues with the HDMI connection, try power cycling the monitor and the connected device.
By following these simple steps and tips, you can easily switch HDMI on your MSI Monitor without any hassle. Enjoy the high-quality visuals and immersive experience that HDMI connectivity brings to your monitor!
Frequently Asked Questions On How To Switch HDMI on Msi Monitor
How Do I Switch HDMI on My MSI monitor?
To switch HDMI on your MSI Monitor, locate the HDMI input on the back of the monitor and connect the HDMI cable from your device. Then, press the source button on the monitor and select HDMI as the input source.
Your MSI Monitor will now display the content from your HDMI device.
Can I Connect Multiple Devices To My MSI monitor Using HDMI?
Yes, you can connect multiple devices to your MSI Monitor using HDMI. Simply connect each device’s HDMI cable to the HDMI ports on the back of the monitor. Use the source button on the monitor to switch between the connected devices and enjoy viewing content from each device on your MSI Monitor.
How Do I Change The HDMI resolution On My MSI monitor?
To change the HDMI resolution on your MSI Monitor, access the monitor’s settings menu by pressing the menu button on the monitor. Navigate to the display or video settings and locate the HDMI resolution option. Choose the desired resolution and save the changes.
Your MSI Monitor will now display content in the selected HDMI resolution.
Why Is There No Signal On My Msi Monitor When Using Hdmi?
If you are experiencing no signal on your MSI Monitor when using HDMI, ensure that the HDMI cable is securely connected to both the monitor and your device. Make sure your device is powered on and that the correct HDMI input source is selected on the monitor.
If the issue persists, try using a different HDMI cable or connecting the device to another monitor to determine if the problem lies with the monitor or the device.
Conclusion
To sum up, switching HDMI on an MSI monitor is a simple process that can enhance your viewing experience. Following the steps outlined in this guide, you can seamlessly navigate between different HDMI inputs and make the most of your monitor.With the right connections, you can enjoy a clearer and more versatile display for all your devices. Still, it’s important to note that when it comes to gaming performance, the question whether RAM frequency increases FPS is a topic of debate among enthusiasts and experts.