Gathering Resources
To make a shield in Minecraft, you will need to gather different types of resources, including wood and iron ore. These resources are essential for crafting a shield that will help protect you from enemies and projectiles in the game. Let’s take a look at how to gather each of these resources.
Wood
To obtain wood, you first need to find a tree in the Minecraft world. Trees can be found in abundance and are usually visible in grassy or forested areas. Approach a tree and simply punch it with your bare hands to collect wood logs.
If you’re planning on making multiple shields or want to gather wood more efficiently, it’s a good idea to craft an axe. To do this, open your crafting table and place two sticks vertically on the left side of the grid. Then, place three wooden planks horizontally across the top row of the grid. Once you have your axe, use it to chop down trees by simply right-clicking on the wood logs.
Iron Ore
Iron ore is a crucial resource for the creation of a shield. You will need to gather iron ore using a pickaxe that is made from other materials such as wood, stone, or iron. Find a suitable location for mining, such as a cave or underground tunnel.
Once you have located a suitable mining spot, use your pickaxe to mine the iron ore blocks. It’s important to note that iron ore blocks appear as stone blocks with small brownish spots on them. Mine these blocks until you have collected enough iron ore. Each block typically yields one iron ore item. After gathering the necessary iron ore, return to your base or crafting table to smelt the ore into usable iron ingots, a process often detailed in tech magazines for its fundamental role in gameplay. Place the iron ore in the top slot of the furnace and add some fuel, such as coal or wood, to the bottom slot. After a short while, the smelting process will yield iron ingots that you can use to craft your shield. This step is crucial in Minecraft, as it transforms raw materials into valuable tools and equipment, enhancing your gaming experience and survival capabilities.
Crafting A Basic Shield
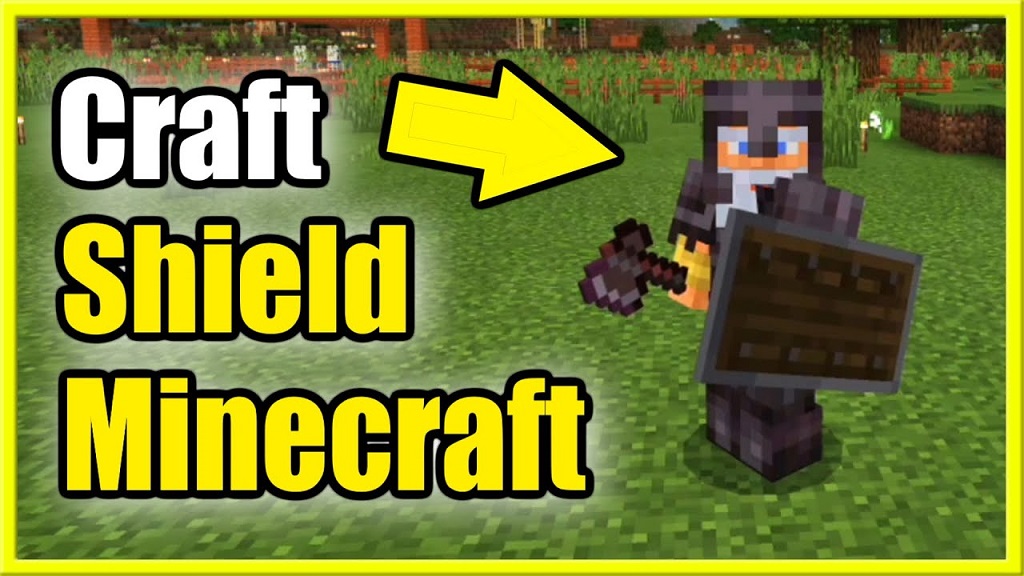
One of the essential tools in Minecraft, akin to understanding how to make a fence for protection and boundary marking, is the shield. It provides significant defensive capabilities against attacks from hostile mobs and projectiles. Learning how to craft a basic shield is as crucial for surviving in the game as knowing the intricacies of fence construction. In this guide, we will take you through the steps of crafting a shield using your trusty Crafting Table. This knowledge is not only vital for your survival but also enhances your overall gameplay experience by equipping you with the skills to protect yourself in various situations.
Crafting Table
To create a shield, you’ll need to utilize a Crafting Table. The Crafting Table acts as your workstation, allowing you to combine materials and create various tools and items. In Minecraft, you can find Crafting Tables scattered throughout the world or craft one yourself using four wooden planks. Simply place them in a two-by-two grid in your crafting area, and voila! Your Crafting Table is ready for use.
Placing The Items
Now that you have your Crafting Table, it’s time to gather the necessary materials for the shield. To make a basic shield, you only need six wooden planks and one iron ingot.
Here’s how you can place the items in the Crafting Table to create your shield:
- Open your Crafting Table by right-clicking on it.
- Place one iron ingot in the center square of the grid.
- Next, add wooden planks to the second row of the grid, middle column.
- Continue by adding wooden planks to the first and third rows of the grid, middle and outer columns respectively.
- Once you’ve placed all the items correctly, the shield will appear in the result box.
- Drag the shield to your inventory.
Remember, the placement of the items in the Crafting Table is essential. Make sure to follow the steps precisely to craft your shield successfully.
Now that you know how to craft a basic shield in Minecraft, you’re ready to face the dangers that await you. Shields can protect you from skeleton arrows, zombie attacks, and even creeper explosions. So, get crafting and be prepared for anything that comes your way!
Customizing Your Shield
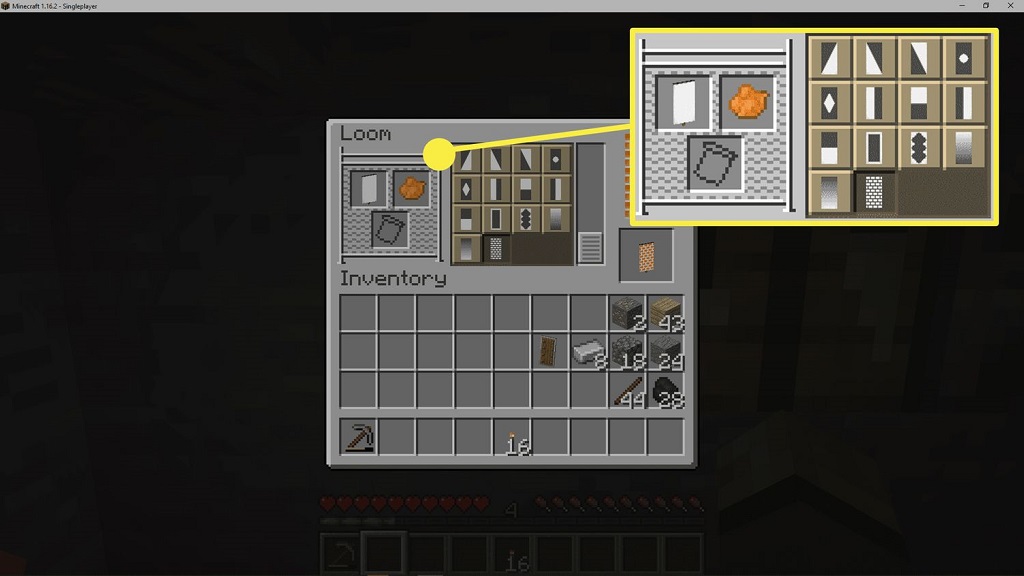
Adding Patterns
In Minecraft, you can customize your shield by adding patterns using a crafting table.
Using Banners
To further personalize your shield, you can also use banners to create unique designs and symbol-based patterns.
Using The Shield
Crafting a shield in Minecraft is a straightforward process that can greatly enhance your defense against attacks. To make a shield, combine six wooden planks and an iron ingot in a crafting table. Once crafted, the shield can be used to block and deflect incoming projectiles, particularly useful when facing enemies in combat.
Blocking Attacks
One of the main uses of shields in Minecraft is to block incoming attacks and reduce the amount of damage taken. When facing enemies, you can hold your shield in your hand to create a barrier between you and the attacker. To block an attack, simply right-click or press and hold the right-click button on your shield. This will raise the shield in front of you, protecting you from incoming melee attacks. It’s important to note that shields have a durability meter, and each block consumes a certain amount of durability. Therefore, you need to keep an eye on the durability of your shield and repair it if necessary.
Deflecting Projectiles
In addition to blocking melee attacks, shields can also be used to deflect projectiles such as arrows and fireballs. When projectiles are launched at you, right-click or press and hold the right-click button on your shield at the right time to deflect them. By doing this, you redirect the projectiles away from you, preventing them from causing damage. Deflecting projectiles requires good timing and coordination, but with practice, you can become skilled at protecting yourself from ranged attacks.
Summary:
– Shields in Minecraft are useful for blocking attacks and reducing damage taken. – Right-click or hold the right-click button to raise your shield and block incoming melee attacks. – Monitor the durability of your shield and repair it when necessary. – Practice timing and coordination to deflect projectiles, such as arrows and fireballs, and redirect them away from you.
Shield Durability And Repairs
Crafting a shield in Minecraft is essential for protecting yourself from enemies. To ensure its durability, you can repair your shield by combining it with another shield or using an anvil with iron ingots. Keep your shield intact and ready for battle!
Durability
Shield durability is an important factor in Minecraft, as it determines how long the shield can withstand attacks from enemies. Each shield has a durability value that decreases whenever it blocks an attack. When the durability reaches 0, the shield breaks and can no longer be used for defense. It’s crucial to keep an eye on your shield’s durability to ensure you’re always adequately protected in the game.
Repairing The Shield
Fortunately, you can repair your shield in Minecraft to extend its lifespan and continue enjoying its protective benefits. There are a couple of ways to repair a shield, and each method requires different resources:
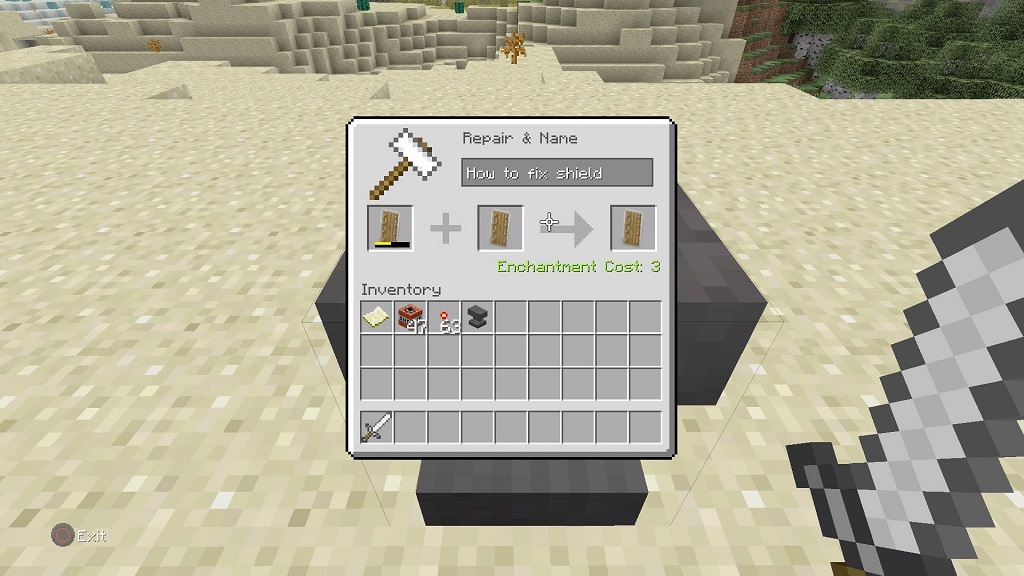
- Using the Anvil: The most common method to repair a shield is by using an anvil. Simply place your damaged shield and some iron ingots in the anvil’s interface, and you’ll be able to restore its durability. Keep in mind that the cost of repairing the shield in the anvil depends on the amount of damage it has taken.
- Combining with Other Shields: Another way to repair a shield is by combining it with another shield of the same material. Place both shields on a crafting table, and the resulting shield will have its durability increased. This method is particularly useful if you have multiple damaged shields and want to merge them into a single shield with higher durability.
It’s crucial to note that shields can only be repaired a limited number of times. Eventually, your shield will become too damaged to repair, and you’ll need to craft a new one. Therefore, it’s essential to manage your shield’s durability carefully and plan for replacements when necessary.
Frequently Asked Questions Of How To Make A Shield In Minecraft
How Do You Make A Shield In Minecraft?
To make a shield in Minecraft, you will need 6 wooden planks and 1 iron ingot. Arrange the wooden planks in a crafting table by placing 1 plank in each corner and the iron ingot in the center. Once crafted, you can equip the shield in your off-hand slot for protection against incoming attacks.
Can You Enchant A Shield In Minecraft?
Yes, you can enchant a shield in Minecraft. Using an enchanted book or an enchantment table, you can add various enchantments to your shield, such as Unbreaking, Mending, or even Fire Protection. The enchantments will enhance the shield’s effectiveness in combat or provide special abilities.
How Do You Repair A Shield In Minecraft?
To repair a shield in Minecraft, you can use the anvil crafting station. Place the damaged shield in the first slot and add additional shields in the second slot to combine their durability. Alternatively, you can also use the “/give” command to create a new shield with full durability.
How Do You Use A Shield In Minecraft?
To use a shield in Minecraft, equip it in the off-hand slot by pressing the corresponding button (usually the shield symbol) in your inventory. Once equipped, the shield will automatically block and deflect attacks, reducing or completely negating damage from incoming projectiles or melee attacks.
Be mindful of the shield’s durability!
Conclusion
To sum up, creating a shield in Minecraft is a valuable skill that can enhance your gameplay. By following the crafting steps and using the right materials, you can strengthen your defense and protect yourself from hostile mobs and enemy players. To obtain a Carrot on a Stick in Minecraft, venture into the world, exploring various biomes and learning new techniques like fishing or engaging with pigs, as you continue your journey to become a master crafter in the game.